Imagine you're an artist, carefully painting a masterpiece on a canvas. You meticulously blend colors, stroke by stroke, until the image comes to life. But what if your creation remains forever wet, never drying to its full potential?
The same can be said for liquid glass epoxy. Understanding the drying and curing times is crucial to ensure a flawless, durable finish.
In this discussion, we will explore the factors that affect the drying and curing process, provide tips for successful results, and reveal how to test for that eagerly awaited moment when your epoxy masterpiece is fully cured and ready for the world to see.
So, let's embark on this journey together and discover the secrets behind the drying and curing times for liquid glass epoxy.
Key Takeaways
- Liquid Glass Epoxy typically dries in 1 to 1.5 hours, but factors such as temperature, humidity, mass, and airflow can affect drying time.
- Deeper pours or thicker applications may require longer drying time.
- Optimal drying conditions include maintaining consistent room and product temperature between 70°F and 84°F, working in a clean and dry environment, and accurately measuring and mixing the epoxy resin and hardener.
- Full curing time for Liquid Glass Deep Pour 24 Hour Cure Epoxy can take up to seven days, and factors like temperature, humidity, mass, and airflow can impact curing time. Maintaining recommended temperature range and controlling humidity levels are crucial for proper curing.
Initial Drying Time
The initial drying time for Liquid Glass Epoxy typically ranges from 1 to 1.5 hours, depending on various factors such as temperature, humidity, mass, and airflow. This cure time is crucial as it marks the beginning of the epoxy resin's transformation from a liquid state to a solid, hardened form.
During this period, the epoxy resin starts to chemically react, resulting in the formation of strong molecular bonds. It's important to note that the initial drying time isn't the same as the full cure time. While the epoxy may appear dry to the touch after this period, it's still in the process of curing and achieving its maximum hardness.
For deeper pours or thicker applications, the cure time may be longer due to the increased mass of the epoxy. It's essential to consider the surrounding conditions, such as temperature and humidity, as they can significantly affect the drying and curing times. Adequate airflow during the curing process helps to facilitate the evaporation of moisture and promote a faster cure.
To ensure proper curing, it's recommended to sand and wipe down the surface with Isopropyl Alcohol before adding additional layers of epoxy. This step helps to remove any contaminants and improve adhesion between the layers.
Factors Affecting Drying Time
Factors such as the type of epoxy resin, formulation variations, working environment temperature, project thickness, and seasonal changes can all impact the drying time of Liquid Glass Epoxy. Understanding these factors is crucial for achieving optimal curing results.
Here are four key factors that can influence the drying time of Liquid Glass Epoxy:
- Type of epoxy resin: Different epoxy resins have varying chemical compositions, which can affect their cure time. It's important to choose the appropriate resin for your specific project to ensure the desired drying time.
- Formulation variations: Epoxy resin formulations can be modified with additives to enhance certain properties. These modifications can alter the drying time, so it's essential to follow the manufacturer's guidelines and use the recommended ratios to achieve the desired results.
- Working environment temperature: The ambient temperature in which the epoxy is applied plays a significant role in the drying time. Higher temperatures accelerate the curing process, while lower temperatures slow it down. It's crucial to work within the recommended temperature range specified by the manufacturer to ensure proper curing.
- Project thickness: The thickness of the epoxy coating or the depth of the epoxy pour can affect the drying time. Thicker projects generally require more time to cure completely. It's important to consider the project thickness and adjust the drying time accordingly.
Optimal Drying Conditions
To ensure optimal drying conditions for Liquid Glass Epoxy, it's essential to consider various factors that affect drying time and the curing process. These factors include:
- The type of epoxy resin used
- The temperature of the working environment
- The thickness of projects
- Seasonal changes
Additionally, it's crucial to work in a clean, dry, dust-free environment with consistent room and product temperature between 70°F and 84°F to promote proper curing.
Drying Time Factors
For optimal drying of liquid glass epoxy, maintaining a temperature range between 70°F and 84°F is crucial. The ambient temperature plays a significant role in the drying time of epoxy.
Here are four factors that can affect the drying time of liquid glass epoxy:
- Properly measured batches of epoxy resin: Accurate measurements ensure the correct ratio of resin and hardener, which directly impacts the drying time.
- Thorough mixing: Ensure that the epoxy resin and hardener are thoroughly mixed to promote uniform drying and curing.
- Consistent room and product temperature: Fluctuations in temperature can disrupt the drying process. Maintain a stable temperature throughout to optimize drying time.
- Avoid large amounts of color additives and high humidity: These factors can impede proper curing and extend the drying time. Minimize their usage for optimal results.
Curing Process Tips
To ensure optimal drying conditions for liquid glass epoxy, it is important to maintain a clean, dry, and dust-free environment during the curing process. This will help prevent any contaminants from interfering with the curing process and ensure a smooth and even finish. In addition to cleanliness, temperature and humidity play a crucial role in the curing process. Optimal curing temperatures for liquid glass epoxy range between 70°F and 84°F. It is important to avoid high humidity conditions, as they can prolong the cure time and potentially affect the final result. For larger volumes or thicker pours, it is recommended to maintain a cooler ambient temperature to prevent excessive heat buildup. Consistently monitoring and maintaining room and product temperatures throughout the curing process will help achieve the desired results.
| Curing Process Tips | Optimal Drying Conditions |
|---|---|
| Cleanliness | Maintain a clean environment to prevent contaminants. |
| Temperature | Keep the temperature between 70°F and 84°F for optimal curing. |
| Humidity | Avoid high humidity conditions that may prolong the cure time. |
Full Curing Time
The full curing time for Liquid Glass Deep Pour 24 Hour Cure Epoxy can extend up to seven days, depending on various factors such as temperature, humidity, mass, and airflow. Achieving a complete cure is crucial to ensure the epoxy's maximum hardness and durability. Here are some important points to consider regarding the full curing time of Liquid Glass epoxy:
- Temperature: The curing time of the epoxy is affected by the temperature of the environment. Higher temperatures can accelerate the curing process, while lower temperatures can slow it down. It's essential to maintain the recommended temperature range for optimal curing.
- Humidity: The level of humidity in the surrounding environment can also impact the curing time. Higher humidity levels can prolong the curing process, so it's important to control the humidity to ensure timely and thorough curing.
- Mass: The thickness or mass of the epoxy layer can affect the curing time. Thicker layers may require more time to fully cure compared to thinner applications. It's necessary to adjust the curing time accordingly, especially for deep pour applications.
- Airflow: Adequate airflow is crucial for proper curing. Sufficient ventilation helps to remove any trapped air bubbles and facilitates the curing process. Ensure proper airflow during the curing time to achieve the desired results.
Factors Affecting Curing Time
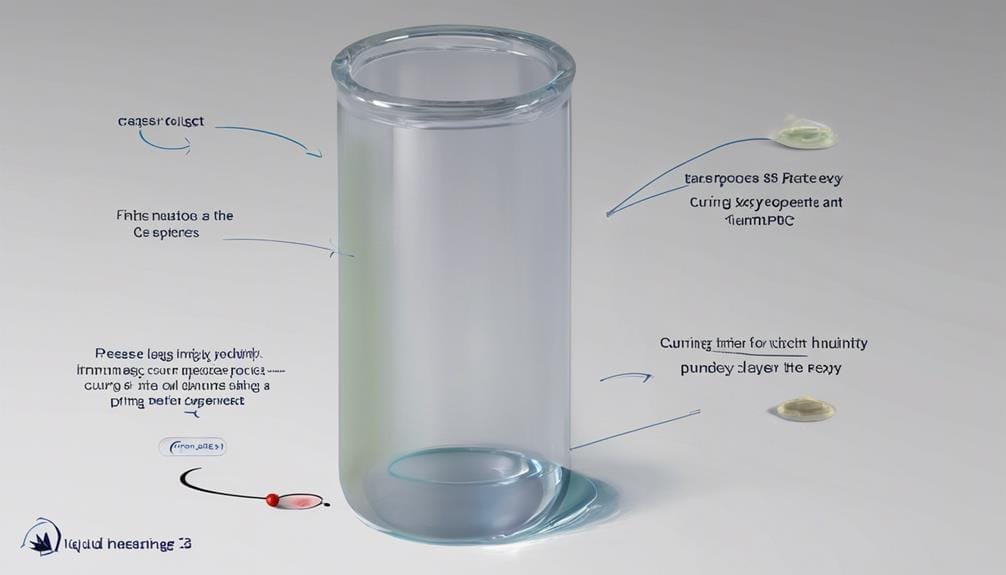
To understand the factors that affect curing time for liquid glass epoxy, you need to consider temperature and humidity.
Higher temperatures and lower humidity levels generally result in faster curing times, while lower temperatures and higher humidity levels can slow down the process.
Additionally, the thickness of the epoxy application plays a role, as thicker projects may require more time to fully cure compared to thin coatings.
Lastly, the mixing ratio and pot life of the epoxy resin should be carefully followed, as improper ratios or expired pot life can affect the curing process.
Temperature and Humidity
Warmer temperatures generally accelerate the curing process of liquid glass epoxy, while higher humidity levels can potentially affect the curing process, especially in areas with high humidity. When it comes to drying and curing times for liquid glass epoxy, temperature and humidity play a significant role. Here are some key points to consider:
- Warmer temperatures speed up the curing process, resulting in shorter drying times.
- Higher humidity levels can potentially alter the curing process, leading to longer drying times or even failed curing.
- Cooler temperatures can slow down the drying and curing process, particularly for larger volume projects or thicker pours.
- Seasonal changes in temperature and humidity can impact the epoxy resin's drying time, making it crucial to account for environmental conditions during the curing process.
Maintaining consistent room and product temperature is essential for the proper curing of liquid glass epoxy. Take the time to prepare for the curing process, as it may require up to 72 hours or longer.
Thickness of Application
When considering the drying and curing times for liquid glass epoxy, the thickness of the application is a critical factor that affects the overall curing time. Thicker projects, such as those with a deep pour, may require longer curing times compared to thin coatings. Factors like temperature and humidity in the working environment can also impact the curing time based on the thickness of the epoxy application. It is important to carefully consider the thickness of the epoxy application to accurately estimate the curing time.
To illustrate the relationship between thickness and curing time, refer to the following table:
| Thickness of Epoxy Application | Estimated Curing Time |
|---|---|
| Thin Coatings | Shorter |
| Medium Coatings | Moderate |
| Thick Pours | Longer |
As the depth of the pour increases, the curing time of the liquid glass epoxy also increases. This is because the curing process requires time for the epoxy to harden and fully cure throughout its entire thickness. Therefore, when working with liquid glass epoxy, it is crucial to take into account the thickness of the application to determine the appropriate drying time.
Mixing Ratio and Pot Life
The mixing ratio and pot life of Liquid Glass Deep Pour Epoxy directly impact its curing time. Properly measuring and mixing the epoxy resin components is crucial to ensure the desired pot life and curing time.
The temperature of the working environment also affects the pot life and curing time, with cooler temperatures extending the pot life and curing time, and warmer temperatures accelerating them. Maintaining consistent room and product temperature is important to achieve the intended pot life and curing time for Liquid Glass Deep Pour Epoxy.
- Mixing ratio: 1 part Base Resin to 1 part Curing Agent by volume or 100 parts Base Resin to 83 parts Curing Agent by weight
- Pot life: influenced by mixing ratio, temperature, and volume
- Proper measurement and mixing: crucial for desired pot life and curing time
- Temperature: cooler temperatures extend pot life and curing time, warmer temperatures accelerate them
Importance of Proper Curing
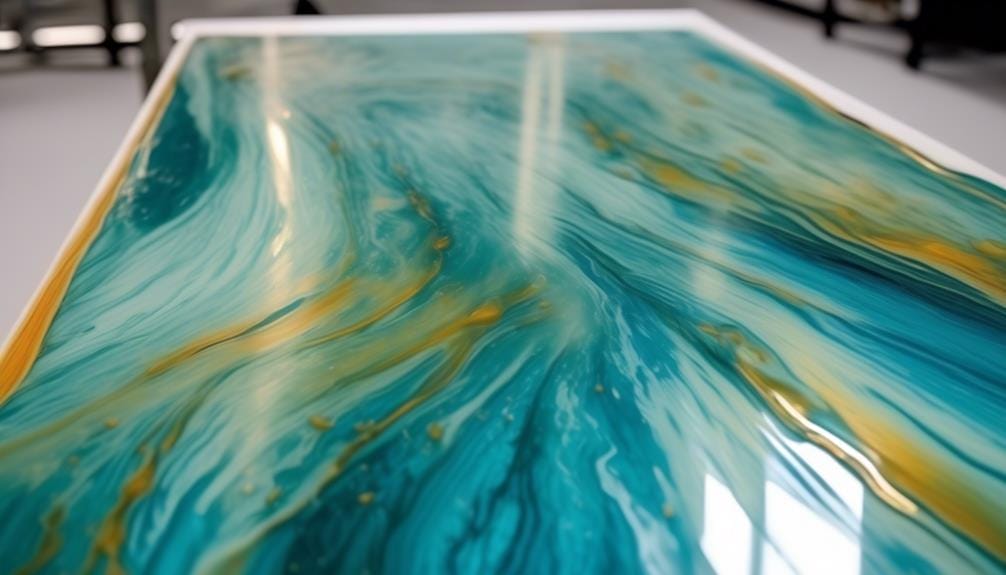
Proper curing is a critical step in epoxy projects, ensuring optimal structural integrity and long-lasting durability. It is essential to follow the recommended curing times and procedures meticulously to achieve the best results and avoid potential issues. The curing process directly impacts the epoxy's ability to withstand environmental factors, such as UV exposure, ensuring a lasting crystal clear finish.
To emphasize the importance of proper curing, let's take a look at the benefits it brings:
| Benefits of Proper Curing | Description |
|---|---|
| Enhanced Structural Integrity | Proper curing strengthens the epoxy, providing excellent resistance to impacts and heavy loads, ensuring the structural integrity of your project. |
| Long-lasting Durability | By allowing the epoxy to cure thoroughly, you ensure its longevity and resistance to wear and tear, making it ideal for high-traffic areas. |
| Smooth and Flawless Surface | Proper curing eliminates imperfections such as bubbles and cloudiness, resulting in a smooth, flawless surface that enhances the overall aesthetic appeal. |
| Environmental Resilience | Adequate curing ensures the epoxy's ability to withstand environmental factors like UV exposure, preventing discoloration and degradation over time. |
Accelerating Drying and Curing
To accelerate the drying and curing process of liquid glass epoxy, there are several techniques you can employ.
First, consider using a heat gun or hairdryer on low settings to speed up the process.
Additionally, increasing airflow by placing the project in a well-ventilated area or using a fan can help quicken the drying and curing.
Lastly, introducing gentle heat through a heat lamp or a warm room can accelerate the epoxy hardening.
Speeding up Drying
To expedite the drying and curing of liquid glass epoxy, consider using a heat gun, heat lamp, or accelerator in a well-ventilated and dry environment.
Here are some ways you can speed up the drying process:
- Use a heat gun or blow dryer on a low setting to accelerate the evaporation of solvents in the epoxy.
- Place the project under a heat lamp or in a warm, dry area to facilitate the curing process.
- Add a small amount of accelerator or hardener to the epoxy mixture to hasten the drying and curing time.
- Ensure proper ventilation and airflow to aid in faster evaporation of solvents, expediting the drying process.
Quickening Curing Process
Using heat sources, such as heat lamps or heating pads, can significantly reduce the usual curing time of Liquid Glass Epoxy, allowing for faster project completion.
Heat accelerates the chemical reaction that causes the epoxy to cure, resulting in shorter curing times. By applying controlled heat to the epoxy surface, the molecules become more active, leading to faster cross-linking and hardening.
It's important to maintain the recommended temperature range during the curing process to ensure optimal results.
Additionally, introducing air circulation through fans or vents can further expedite the drying and curing of Liquid Glass Epoxy by promoting solvent evaporation. This combination of heat and air circulation creates an ideal environment for quickening the curing process.
Utilizing these techniques can greatly reduce curing times, allowing for efficient completion of projects involving Liquid Glass Epoxy.
Accelerating Epoxy Hardening
By implementing various techniques and additives, the hardening process of liquid glass epoxy can be accelerated, allowing for faster drying and curing times. Here are some methods to consider:
- Utilize heat lamps, heat guns, or additional heat sources to apply heat to the curing environment. This increased temperature speeds up the epoxy hardening process.
- Add accelerators to the epoxy mixture. These additives enhance the drying and curing process, reducing the overall cure time.
- Increase the ambient temperature in the curing area. Higher temperatures accelerate epoxy hardening, resulting in shorter curing times.
- Incorporate a forced air system to improve air circulation and heat distribution. This enhances the drying and curing process by promoting faster evaporation of solvents and increasing the overall speed of epoxy hardening.
Testing for Dryness and Cured State
Perform a tackiness test or a fingernail test to determine the dryness and cured state of the liquid glass epoxy. These tests are simple yet effective ways to assess the progress of drying and curing. By following these steps, you can ensure that your epoxy has reached the desired state before moving forward with your project.
To conduct a tackiness test, lightly press your finger against the epoxy surface and check for any material sticking to your finger. If the epoxy feels sticky or leaves residue on your finger, it is not fully dry or cured. On the other hand, a cured epoxy surface should be smooth and dry to the touch.
Another method is the fingernail test. Gently scratch the epoxy surface with your fingernail and observe if it leaves a mark or feels soft. If the surface remains intact and does not show any marks or indentations, it indicates that the epoxy has fully cured.
For a more precise assessment, consider using a moisture meter. This tool measures the moisture content in the epoxy and can determine if it has reached the desired dryness level. It is particularly useful when working with thicker layers of epoxy or in environments with high humidity.
Keep in mind that the drying and curing times can vary depending on factors such as temperature, humidity, and epoxy thickness. It is essential to allow sufficient time for the epoxy to fully cure before using it in your project. Refer to the manufacturer's instructions for recommended drying and curing times based on the specific epoxy product you are using.
| Test Method | Procedure | Desired Result |
|---|---|---|
| Tackiness | Lightly press your finger against the epoxy surface | No material sticking to your finger |
| Fingernail | Gently scratch the epoxy surface with your fingernail | No marks or softness |
| Moisture Meter | Use a moisture meter to measure the moisture content in the epoxy | Moisture content within the desired range |
Performing these tests will ensure that your liquid glass epoxy has dried and cured properly, providing you with a reliable and durable final product.
Common Mistakes That Affect Drying and Curing
Many factors can negatively impact the drying and curing process of liquid glass epoxy, leading to potential mistakes and undesirable results. It's crucial to be aware of these common mistakes to ensure a successful epoxy project.
Here are four key factors that can affect the drying and curing of liquid glass epoxy:
- Excessive use of color additives: Using a large amount of color additive can hinder proper curing. It's important to follow the recommended dosage to avoid any curing issues.
- High humidity: High humidity levels can significantly alter the curing process, especially in areas with high humidity. It's essential to control the humidity levels in the working environment to achieve the desired curing results.
- Additives and external factors: Different additives or external factors can impact the curing process of liquid glass epoxy. It's crucial to be aware of the specific characteristics and requirements of the epoxy resin being used to avoid any unforeseen complications.
- Lack of testing: Failing to test epoxy resin in a small project before using it in a larger one can result in costly mistakes. Conducting a test project allows you to identify any potential issues or limitations of the epoxy resin, ensuring a smoother and more successful application.
Tips for Successful Drying and Curing
To ensure successful drying and curing of liquid glass epoxy, follow these tips for optimal results.
- Start by properly mixing the epoxy resin and curing agent for a minimum of 6 minutes, ensuring that you scrape the sides and bottom thoroughly. This step is crucial to ensure that the resin and curing agent are fully blended, allowing for a consistent and effective curing process.
- Maintaining a clean, dry, and dust-free environment is also essential for the drying and curing of liquid glass epoxy. Ensure that the temperature in the room is between 70°F and 84°F for best results. Fluctuations in temperature can affect the curing time and may lead to an unsatisfactory outcome.
- To further enhance your understanding of epoxy resins, consider using a comparison guide to compare the properties of different options. Seeking advice from experienced users or professionals can also be beneficial, especially when troubleshooting issues that may arise during the drying and curing process.
- Consistency is key when it comes to temperature. Make sure the room temperature and the temperature of the epoxy resin are consistent. Be prepared for the curing process to take up to 72 hours or even longer, depending on the specific product and conditions.
- It is always a good practice to test a new epoxy resin with a small project before using it extensively. This allows you to familiarize yourself with the drying times and ensure that you achieve the desired results. If you have any questions or need more information on epoxy drying times, don't hesitate to contact customer support for assistance.
Frequently Asked Questions
How Long Does Liquid Glass Epoxy Take to Cure?
Liquid glass epoxy takes varying amounts of time to cure, depending on factors such as temperature, humidity, mass, and airflow. The curing process can take up to 7 days for full cure and maximum hardness.
How Long Does 2 Part Epoxy Resin Take to Cure?
Liquid glass epoxy resin takes approximately 24 hours to fully cure. However, several factors such as temperature, humidity, and mixing time can affect the curing process. Creating optimal drying conditions will help expedite the curing time.
What Is the Difference Between Epoxy Resin and Liquid Glass?
Liquid glass epoxy, unlike regular epoxy resin, allows for deep pours up to 4 inches, making it ideal for various applications. Its bubble-less technology creates a flawless finish, perfect for art projects.
Does Liquid Glass Dry Clear?
Yes, liquid glass epoxy dries clear, providing a transparent finish. It is highly suitable for various applications such as countertops, river tables, and artwork. You can achieve a glossy finish by using proper curing techniques.
Conclusion
In conclusion, the drying and curing times for liquid glass epoxy play a crucial role in achieving optimal results.
With an initial drying time of 1-1.5 hours and full cure taking up to 7 days, it's important to consider factors such as temperature, humidity, mass, and airflow for successful drying and curing.
Interestingly, the epoxy offers the highest UV yellowing resistance, ensuring long-lasting performance for both indoor and outdoor applications.

