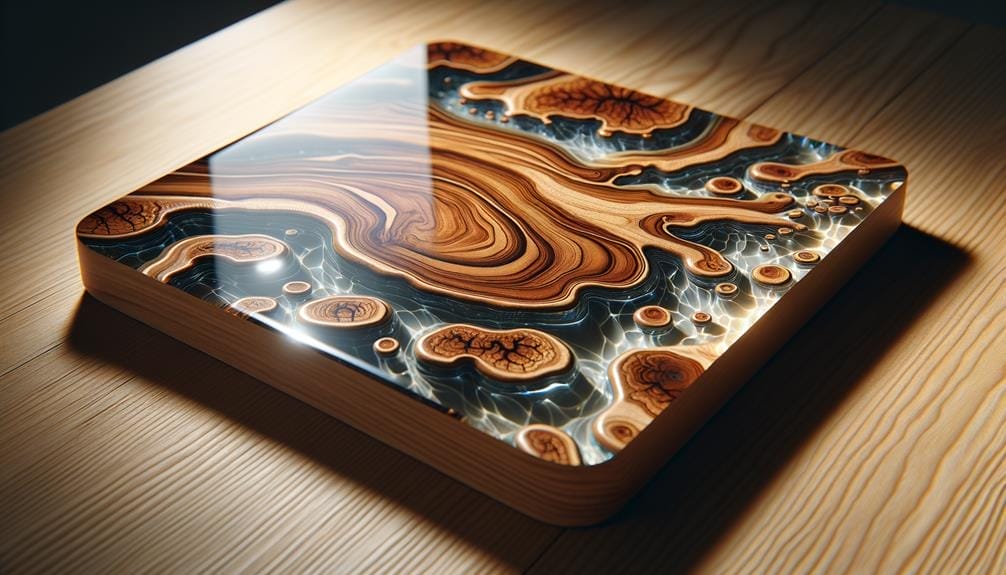
If you've encountered a few hiccups while applying liquid glass epoxy, rest assured that there are solutions to get you back on track. Sometimes, the resin might not behave exactly as expected, but fear not, troubleshooting techniques can help you overcome these challenges.
Whether it's dealing with bubbles, streaks, uneven coating, or curing issues, there are steps you can take to achieve the flawless finish you desire.
So, let's explore some common problems and their solutions, ensuring your epoxy application is a smooth and successful endeavor.
Key Takeaways
- Bubbles during epoxy application can be prevented by properly mixing the epoxy and using a heat gun or torch to remove any trapped air.
- Streaks in the epoxy surface can be avoided by applying the epoxy in thin coats and using a foam roller or brush to evenly distribute the epoxy.
- Uneven epoxy coating can be fixed by sanding the surface and applying a second coat of epoxy to achieve a smooth and even finish.
- Epoxy not curing properly can be troubleshooted by checking the temperature and humidity conditions, using a proper epoxy-to-hardener ratio, and ensuring thorough mixing of the components.
Bubbles During Epoxy Application
To prevent bubbles during epoxy application, it's crucial to mix the resin and hardener carefully and slowly. Bubbles can arise if the mixing process is rushed or not done properly. When combining the two components, use a stirring stick or paddle to mix them together in a gentle, folding motion. Avoid stirring vigorously, as this can introduce air into the mixture and create bubbles. Additionally, make sure to pour the epoxy in a thin, even coat to minimize the chances of bubbles forming.
The temperature of the working environment can also affect bubble formation. Epoxy should be applied in an area with a temperature between 70 and 80 degrees Fahrenheit. If the temperature is too cold, the epoxy may not flow smoothly and can trap air bubbles. On the other hand, if the temperature is too hot, the epoxy may cure too quickly, leaving little time for bubbles to rise to the surface and pop.
If bubbles do appear during the curing process, you can use a heat gun to remove them. Gently pass the heat gun over the surface of the epoxy, keeping it a few inches away to avoid overheating. The heat will cause the bubbles to rise and burst, leaving a smooth finish. However, it's important to be cautious as excessive heat can damage the epoxy or cause it to become discolored.
Streaks in the Epoxy Surface
If you notice streaks in the epoxy surface, it's likely due to uneven application or improper mixing of the epoxy resin and hardener. To avoid this issue, make sure the epoxy is properly mixed by scraping the sides of the container and stirring thoroughly. Additionally, apply the epoxy in thin, even layers to prevent streaks from forming as it cures.
To fix streaks in the epoxy surface, there are a few steps you can take. First, use a heat gun or torch to carefully remove any air bubbles and ensure a smooth surface. Sweep the heat gun back and forth over the epoxy, being cautious not to overheat it. This will help to eliminate streaks and imperfections.
If the streaks persist, you can apply a seal coat to ensure a more even surface. Clean the surface with Isopropyl Alcohol to remove any dirt or contaminants. Then, pour a thin layer of epoxy over the surface and spread it evenly with a foam brush or squeegee. This will help to fill in any imperfections and create a smoother finish.
If the streaks are still visible after applying a seal coat, lightly sand the surface with fine-grit sandpaper. Use a sweeping motion back and forth to avoid creating new streaks. Clean the surface again to remove any dust before applying another layer of epoxy.
Uneven Epoxy Coating
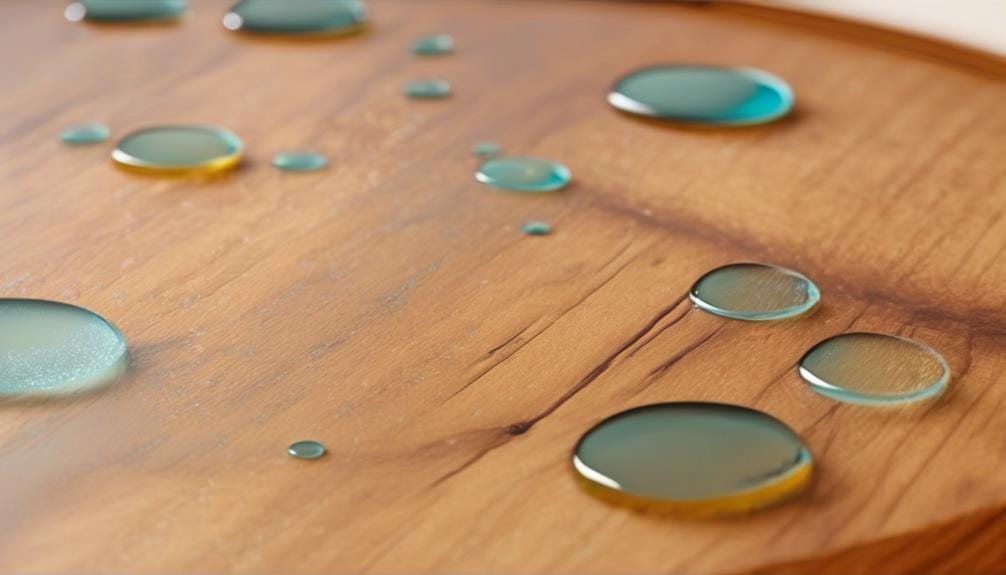
Are you struggling with achieving a smooth and even epoxy coating? Uneven epoxy coating can occur due to various reasons, such as improper mixing of the resin and hardener or inadequate surface preparation.
To prevent this issue, ensure that you mix the epoxy components thoroughly and prepare the surface properly before application.
If you're dealing with an uneven coating, don't worry, there are methods available to fix it and achieve a flawless finish.
Causes of Uneven Coating
Uneven coating can occur due to a variety of factors, including the uneven distribution of epoxy resin during application. Here are some causes of uneven coating to be aware of:
- Inadequate surface preparation, such as leaving the wood surface unclean or rough.
- Pouring epoxy resin too quickly, not allowing it enough time to self-level.
- Using an incompatible catalyst or adding additives after mixing the resin and catalyst.
- Improper temperature regulation in the working environment, leading to uneven curing and coating.
To ensure a smooth and even coating, make sure to thoroughly mix the epoxy resin and follow all mixing directions. Clean and prepare the surface properly, and pour the resin slowly to allow it to self-level. Maintain proper temperature conditions and avoid adding incompatible substances.
Prevention Methods
To achieve a smooth and even epoxy coating, utilize prevention methods such as using a perfectly flat surface and controlling room temperature. This will help ensure that the epoxy resin spreads evenly and cures properly. Here are some additional prevention methods to consider:
| Prevention Methods | Description |
|---|---|
| Apply a seal coat | Applying a seal coat before pouring the epoxy resin can help prevent waves and ripples on the surface. |
| Pre-treat wood | Pre-treating wood surfaces with an extra coating of epoxy resin can also help prevent waves and ripples in the epoxy. |
| Sand and prepare | Properly sanding and preparing the surface before applying epoxy resin is crucial to avoid an uneven coating. |
| Use a torch or heat | Utilize a torch or heating device to release bubbles and achieve a smooth finish on the epoxy surface. |
| Control ambient temp | Controlling the ambient temperature in the room where the epoxy is being applied is important for proper curing. |
Fixing Uneven Epoxy
To fix an uneven epoxy coating, there are several steps you can take to ensure a smooth and flawless finish:
- Pouring deep pour epoxy evenly onto the surface.
- Scraping the sides to remove any excess epoxy.
- Adding another layer of epoxy to even out the surface.
- Allowing the epoxy to harden within the recommended time frame.
- Finally, sanding and polishing the surface thoroughly for a smooth finish.
It's important to create the right working environment by controlling the temperature and humidity of the room. Proper ventilation is also crucial for achieving an even surface.
If you encounter any issues or need further assistance, don't hesitate to reach out to customer service for guidance. By following these steps and taking the necessary precautions, you can easily fix an uneven epoxy coating and achieve professional results.
Epoxy Not Curing Properly
If you are experiencing issues with your epoxy not curing properly, there may be a few factors to consider. It is important to ensure that you are using the correct ratio of resin to catalyst, as an incorrect usage ratio can affect the catalysation process and result in improper curing. Additionally, pouring another layer of epoxy before the previous one has hardened can disrupt the curing process and lead to incomplete curing. Low temperatures can also increase curing time, so it is important to work in a temperature-controlled environment. Another common issue is incorrect mixing, which can result in areas of unmixed resin and catalyst. Finally, adding additives after mixing the resin and catalyst can interfere with the curing process and prevent proper hardening.
To help you troubleshoot the issue, here is a table summarizing the possible causes and solutions for epoxy not curing properly:
| Possible Cause | Solution |
|---|---|
| Incorrect usage ratio affecting catalysation | Double-check the ratio and measure accurately |
| Pouring another layer before previous one has hardened | Allow the previous layer to fully cure before adding another |
| Low temperature increasing curing time | Increase the ambient temperature or use a heat source |
| Incorrect mixing | Thoroughly mix the resin and catalyst until fully combined |
| Adding additives after mixing resin and catalyst | Add additives before mixing resin and catalyst |
Surface Imperfections After Epoxy Application
If you encountered issues with your epoxy not curing properly, you may also run into surface imperfections after epoxy application. These imperfections can detract from the overall appearance and smoothness of your project. To troubleshoot surface imperfections after epoxy application, follow these tips:
- Mix the epoxy thoroughly: Ensure that you mix the epoxy resin and hardener together completely, scraping the sides and bottom of the container to eliminate any unmixed portions.
- Use light enough weights: When curing the epoxy, make sure that the weights you use aren't too heavy. Heavy weights can cause the epoxy to spread unevenly and create surface imperfections.
- Control the ambient temperature: The ambient temperature can affect how the epoxy cures. Make sure that the temperature is within the recommended range for the epoxy you're using.
- Sand the surface: If you notice any imperfections after the epoxy has cured, you can use a fine grit sandpaper to gently sand the surface. This will help to smooth out any bumps or uneven areas.
- Apply a top coat: To further enhance the surface smoothness and eliminate imperfections, consider applying a top coat of epoxy over the cured layer. This will provide an additional layer of protection and ensure a flawless finish.
Epoxy Discoloration or Yellowing

Epoxy discoloration or yellowing can occur due to various factors. Exposure to UV light or sunlight is one of the primary causes. When epoxy is exposed to these elements, it can undergo a chemical reaction that results in discoloration or yellowing.
Additionally, using low-quality epoxy or applying it using inappropriate methods can lead to discoloration. It's crucial to use a high-quality epoxy that's specifically designed for the intended application.
Temperature changes and humidity levels can also contribute to epoxy discoloration. Fluctuations in temperature and humidity can cause the epoxy to react differently, resulting in discoloration on the surface.
Accurate ratios of epoxy resin and hardener are essential for a successful application. Insufficient or excessive amounts of either component can cause discoloration.
Lastly, adding incompatible pigments or dyes can lead to yellowing or discoloration. It's crucial to use compatible additives to ensure the desired color and appearance.
To prevent epoxy discoloration or yellowing, thoroughly mix the epoxy, scrape the bottom and sides of the container, and apply it to a clean and dry surface. Taking these precautions will help minimize the risk of discoloration or yellowing.
Epoxy Not Adhering to the Surface
If you're having trouble with epoxy not adhering to the surface, there are a few points to consider.
First, ensure that you have properly prepared the surface by cleaning and sanding it if necessary.
Second, make sure you're mixing the epoxy resin and hardener in the correct ratio and following the manufacturer's instructions.
Finally, take into account the temperature and humidity conditions, as extreme variations can affect the adhesion of the epoxy.
Following these points will help improve the adherence of the epoxy to the surface.
Surface Preparation Methods
To ensure proper adhesion of the epoxy, it's crucial to thoroughly clean the surface using Isopropyl Alcohol 90%+ to remove any impurities. Here are some surface preparation methods to help the epoxy adhere effectively:
- Thoroughly scrape the surface to remove any loose paint, varnish, or debris.
- Use light weights to hold down any lifted areas, ensuring a flat and even surface.
- Use a grit sandpaper to create a rough texture, allowing the epoxy to grip better.
- Apply a seal coat if working with porous materials like wood to prevent air bubbles and promote adhesion.
- Control the ambient temperature to be within the recommended range for epoxy application.
Proper Mixing Techniques
When ensuring the proper adhesion of epoxy to the surface, it's essential to master the art of proper mixing techniques. To troubleshoot the issue of epoxy not adhering to the surface, start by thoroughly mixing the epoxy resin and activator in a 2:1 ratio for deep pours.
Stir the mixture for at least 5 minutes, scraping the sides and bottom of the container to ensure all components are thoroughly combined. Then, transfer the mixture to a new container and continue mixing for an additional 3 minutes.
Before applying the seal coat, clean the surface with Isopropyl Alcohol 90%+. This step will remove any contaminants that could hinder adhesion.
Temperature and Humidity
Temperature and humidity play a crucial role in the adhesion of epoxy to the surface, making it essential to consider these factors during application. Here are some important points to keep in mind:
- Low temperature can prevent proper adhesion of epoxy to the surface.
- High humidity can negatively affect the curing process and result in poor adhesion.
- Use a heat gun to remove air bubbles, but be mindful of the temperature and humidity conditions.
- Ensure that the working environment is at least 70 degrees for optimal epoxy adhesion.
- Clean and dry the surface thoroughly to promote better adhesion of the epoxy.
Epoxy Cracking or Peeling
Epoxy cracking or peeling can be caused by a few different factors. One common cause is incorrect mixing ratios or inadequate resin and hardener blending. When the ratios aren't properly measured or mixed, the epoxy can become soft, runny, or tacky, leading to cracking and peeling. To ensure a proper mix, it's important to scrape the sides of the container and thoroughly blend the resin and hardener together.
Another factor that can contribute to epoxy cracking or peeling is cold temperatures during curing. If the epoxy is exposed to low temperatures, it may remain tacky and not fully cure, resulting in cracks or peeling. It's important to keep the temperature within the recommended range for curing.
Adequate surface preparation is also crucial to prevent epoxy from cracking or peeling. Before pouring the epoxy, make sure to clean and smooth the surface. If necessary, use grit sandpaper to ensure a clean and rough surface that will promote good adhesion.
In addition, using unrelated or incompatible catalysts with the epoxy resin can lead to poor adhesion, causing cracking or peeling. It's important to use the recommended catalyst or hardener for the specific epoxy resin being used.
If you encounter cracks or peeling in the epoxy, there are a few things you can try to address the issue. One option is to use a heat gun to gently heat the area and improve adhesion. This can help the epoxy to bond better to the surface. It's also a good idea to flex the surface to check for any remaining weak spots and address them accordingly.
Epoxy Drying Too Quickly or Slowly
If you're experiencing issues with epoxy drying too quickly or too slowly, there are a few possible reasons.
High temperatures can cause epoxy to dry too quickly, while low temperatures or incorrect product ratios can result in slow drying.
To prevent quick drying, maintain the working environment temperature and avoid excessive product doses.
For slow drying, ensure the environment isn't too cold and mix the product correctly.
Quick Drying Epoxy
To prevent issues with quick drying epoxy, ensure that the working environment's temperature isn't affecting the polymerization process. Make sure your surface, sides, and bottom are thoroughly prepared before applying the epoxy. This will help promote proper adhesion and prevent any premature drying.
It's recommended to scrape the sides of the container while mixing the epoxy to ensure thorough mixing and avoid any unmixed portions. The curing time of epoxy varies depending on temperatures, so it's important to monitor the temperature of the working environment.
To achieve a smooth and even surface, use a sweep back technique while applying the epoxy. Lastly, leave the heat gun aside during the curing process to prevent any unwanted issues.
Slow Drying Epoxy
For successful epoxy application, it is important to address the issue of slow drying, whether the epoxy is drying too quickly or too slowly. Slow drying epoxy can be frustrating, but there are ways to troubleshoot and resolve this problem. Here are some tips to help you overcome slow drying epoxy:
| Possible Causes | Solutions |
|---|---|
| Incorrect Mixing Ratio | Ensure you are following the recommended mixing ratio of epoxy resin and hardener, usually 1:1. Measure accurately using a digital scale. |
| Cold Temperatures | Epoxy resin cures slower in colder temperatures. Increase the temperature of the working environment to speed up the drying process. |
| Inadequate Mixing | Thoroughly mix the epoxy resin and hardener for at least 3 minutes, scraping the sides and bottom of the container to ensure proper blending. |
| Excessive Colorant | Reduce the amount of colorant added to the epoxy mixture, as it can slow down the drying time. |
Epoxy Drying Issues
When experiencing epoxy drying issues, whether it's drying too quickly or too slowly, there are several factors to consider and troubleshoot. Here are some tips to help you with your epoxy drying problems:
- Check the mixing ratios and make sure they're accurate to prevent epoxy from drying too quickly or slowly.
- Be mindful of the working environment temperature, as low temperatures can slow down the curing process, while high temperatures can make it dry too quickly.
- To prevent bubbles on the resin surface, mix the epoxy slowly and carefully, and use a heat gun to remove any small bubbles during curing.
- If you notice streaks or uneven coating, make sure to apply the epoxy evenly and smoothly to achieve a smooth finish.
- When dealing with micro-holes, use a spatula to fill them with resin and apply a second coat if necessary.
Dealing With Dust or Debris in the Epoxy
Prevent dust or debris from compromising the final result by carefully removing any particles that fall into the wet epoxy using a wooden stick or tweezers.
It's important to maintain a clean workspace to avoid epoxy contamination and achieve a smooth finish. Before starting the epoxy application, ensure that the surface is properly prepared and free from any dirt or dust. This can be done by cleaning the surface with appropriate cleaning techniques and ensuring that the area is dust-free.
During the epoxy application process, cover the project with a clean box or container to prevent particles from falling into the epoxy. Working in a clean environment with proper ventilation can also minimize the presence of dust or debris in the epoxy.
If particles do end up in the epoxy, it's best to remove them before the epoxy starts gelling or hardening. Once the epoxy has hardened, it becomes difficult to remove particles without affecting the finish. In such cases, carefully sand and refinish the surface to achieve a smooth and flawless result.
Troubleshooting Epoxy Odor or Fumes
To address any issues with epoxy odor or fumes, take proactive measures to ensure a well-ventilated workspace. Proper ventilation is key to preventing the buildup of epoxy fumes and minimizing the risk of inhalation. Here are some important tips to consider:
- Use a well-functioning ventilation system or open windows and doors to allow fresh air to circulate in the workspace.
- Wear appropriate respiratory protection, such as a respirator with organic vapor cartridges, to prevent inhalation of epoxy fumes.
- Follow safety precautions provided by the epoxy manufacturer, including using the epoxy in a well-ventilated area and avoiding direct contact with the skin or eyes.
- Consider using odor elimination methods, such as air purifiers or activated carbon filters, to help reduce the smell of epoxy in the workspace.
- If you aren't experienced in epoxy application, it's advisable to seek professional epoxy application services to ensure proper safety measures and ventilation systems are in place.
Additionally, if the odor or fumes from epoxy are a concern for you, there are alternative epoxy options available that have lower odor levels. These alternatives can provide a safer and more comfortable working environment while still achieving high-quality results.
Frequently Asked Questions
Why Is My Epoxy Not Adhering?
Your epoxy may not be adhering due to common mistakes such as incorrect mixing ratio, pouring another layer too soon, low temperature, or adding additives after mixing. Proper surface preparation and following instructions can promote better adhesion.
Why Has My Epoxy Resin Not Set?
Your epoxy resin may not have set due to common mistakes like incorrect mixing ratios or pouring another layer too soon. Factors like low temperatures and humidity can also affect curing time. Troubleshoot by following proper mixing techniques and ensuring optimal adhesion.
How Long Does It Take for Liquid Glass Epoxy to Cure?
Liquid glass epoxy typically takes 48-72 hours to fully cure. Factors like temperature and thickness can affect curing time. To achieve a smooth finish, prepare properly and avoid common mistakes. Troubleshoot bubbles by gently heating the surface.
What Temperature Should Liquid Glass Deep Pour Epoxy Be?
To achieve optimal results with Liquid Glass Deep Pour Epoxy, maintain a warm working environment between 68-77 degrees Fahrenheit. Avoid temperature fluctuations during curing and adjust as needed for different projects and climates.
Conclusion
In conclusion, troubleshooting issues with liquid glass epoxy application can be resolved by following proper mixing ratios, ensuring a clean and smooth surface, and working in suitable temperature conditions.
Remember the adage 'measure twice, pour once' to emphasize the importance of accuracy in the epoxy application process.
By addressing common problems like bubbles, streaks, and curing issues, you can achieve a flawless and professional epoxy coating.
Happy epoxy-ing!


