Are you frustrated with epoxy resin issues that always seem to arise when you least expect them?
From uncured resin to sticky surfaces, there are a plethora of problems that can throw a wrench in your project.
But fear not because there are solutions to these common epoxy resin woes.
In this discussion, we will explore troubleshooting techniques and tips that will help you overcome these challenges and achieve the flawless results you desire.
So, let’s dive in and discover how to conquer those epoxy resin issues once and for all.
Key Takeaways
- Proper mixing and careful pouring are essential to prevent uncured resin and bubbles.
- Using a heat gun or resin with a bubble release agent can help remove or prevent bubbles in the curing process.
- Surface imperfections can be avoided by working in a clean and well-ventilated area and ensuring the resin is fully cured before adding additional layers.
- To prevent the yellowing of resin, use a resin with UV and HALS stabilizers, avoid direct sunlight, and store resin in a cool, dark place away from high temperatures.
Uncured Resin
If your epoxy resin isn’t hardening within the indicated time, there may be several factors contributing to its uncured state.
One possible reason could be an incorrect usage ratio, which affects the catalysis process. It’s essential to follow the manufacturer’s instructions carefully to ensure the correct amount of resin and catalyst is used.
Pouring another layer before the previous one has fully hardened can also lead to uncured resin. This is because the curing process is interrupted, preventing the resin from reaching its full hardness.
Low temperatures can also increase the curing time of epoxy resin, resulting in uncured resin. If the temperature is too low, the chemical reaction that causes the resin to harden will be slowed down.
Additionally, incorrect mixing or adding additives after the resin and catalyst have been mixed can interfere with the curing process, leading to uncured resin.
Air bubbles trapped within the resin can also prevent it from fully curing. These bubbles can be introduced during the mixing process or due to improper pouring techniques. It’s crucial to mix the resin and catalyst thoroughly and pour it slowly to minimize the formation of air bubbles.
Bubbles in Resin
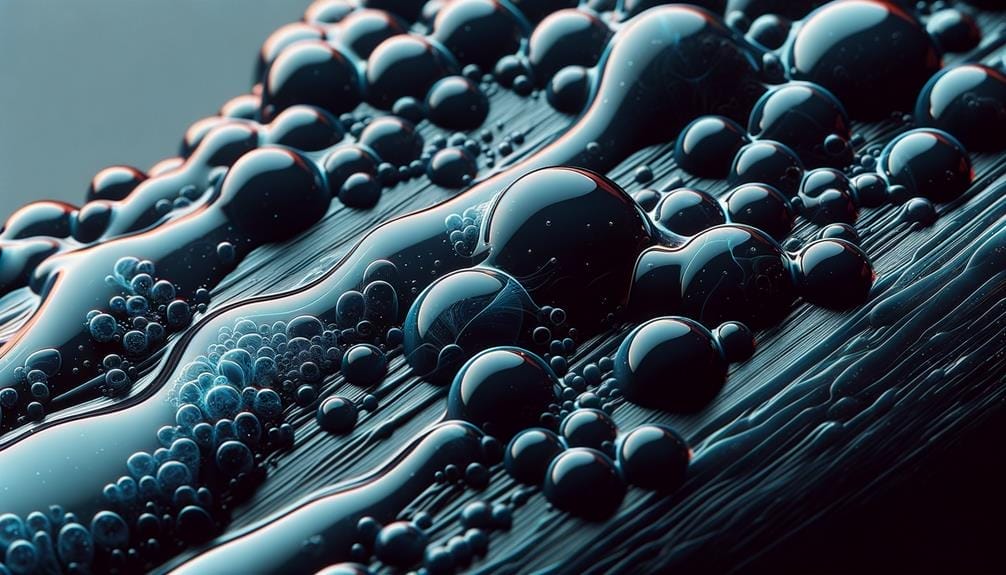
Are you experiencing bubbles in your epoxy resin? Bubbles can be caused by various factors such as overenthusiastic mixing, cold resin, or adding items to the resin.
To prevent bubbles, it’s important to mix the resin carefully and slowly, avoiding any excessive mixing. Additionally, using a heat gun during the curing process or using resin with a bubble release agent can help remove or prevent bubbles in the cured resin.
Causes of Bubbles
Improper mixing and cold resin are common causes of bubbles in epoxy resin during the curing process. When working with epoxy, it’s important to understand the potential causes of bubbles to ensure a smooth and flawless finish.
Here are three factors that contribute to the formation of bubbles:
- Overenthusiastic mixing: While it may seem counterintuitive, excessive mixing can introduce air into the resin. It’s crucial to mix the resin and hardener thoroughly but gently to avoid creating bubbles.
- Cold resin: Cold ambient temperatures can cause the resin to become more viscous, making it difficult for bubbles to rise and escape. To prevent this, warm up the resin before pouring it to ensure a more fluid consistency.
- Improper layering: Adding items, such as pigments or additives, to the resin without proper mixing can trap air and result in bubbles. It’s essential to mix any additions thoroughly to release any trapped air before pouring the resin.
Prevention Techniques
To prevent bubbles in epoxy resin, it’s crucial to mix the resin and hardener carefully and slowly, ensuring that no air is introduced during the process. This can be achieved by gently stirring the two components together, making sure to scrape the sides and bottom of the mixing container. Avoid stirring too vigorously, as this can introduce air bubbles.
Another prevention technique is to use a heat gun to remove any small bubbles that may have formed during the curing process. Pass the heat gun over the surface of the resin, being careful not to apply too much heat.
Additionally, it’s important to avoid adding items that release bubbles into the resin, such as porous materials or objects with air pockets. When pouring resin, be sure to pour it over non-porous substrates to minimize the chance of bubbles forming.
If bubbles do occur during the curing time, it may be necessary to add another layer of resin to fill in any gaps and avoid trapped air.
Bubble Removal Methods
To remove bubbles in epoxy resin, proper bubble removal methods must be employed after prevention techniques have been implemented. Here are three effective methods for removing bubbles in epoxy resin:
- Mixing carefully: One of the main causes of bubbles in resin is the introduction of air during the mixing process. To prevent air bubbles, mix the resin carefully and slowly, ensuring that you scrape the sides and bottom of the container to incorporate the components fully.
- Using a heat gun: If small bubbles appear on the resin surface during the curing process, you can use a heat gun to warm the surface gently. This will help the bubbles rise and pop, leaving the resin with a smooth finish. Be careful not to overheat the resin, as it can result in an ‘orange peel’ texture.
- Applying another layer of resin: If bubbles continue to appear even after using prevention techniques and a heat gun, you can apply another layer of resin. This will help fill in any remaining bubbles and provide a smooth, bubble-free finish.
Surface Imperfections
You may encounter surface imperfections on your epoxy resin projects, which can be frustrating. Various factors, such as foreign objects in the resin or improper pouring techniques, can cause these imperfections.
To prevent surface imperfections, it’s crucial to work in a clean and well-ventilated area, cover your work to avoid settling foreign objects, and ensure the resin is fully cured before adding additional layers.
Causes of Imperfections
Surface imperfections in epoxy resin can be caused by various factors such as inadequate mixing, uneven curing, resin repellence, and a cloudy appearance due to low temperature. To ensure a smooth and flawless finish, it’s crucial to address these causes of imperfections.
- Inadequate mixing: When the resin and hardener aren’t mixed thoroughly, it can result in lines or streaks in the top layer of the cured resin. To avoid this, take your time and mix the resin kits according to the manufacturer’s instructions.
- Uneven curing: If the mold surface or the mold itself isn’t level, the resin may not settle evenly, leading to an uneven coat. Ensure that your work area is level and the mold is properly prepared before pouring the resin.
- Resin repellence: Oils or wet surfaces can repel the resin mix, preventing it from settling and curing properly. Make sure to clean and dry your work surface thoroughly before pouring the resin to avoid any issues.
Prevention and Solutions
Imperfections caused by inadequate mixing and uneven curing can be prevented and resolved through specific techniques and precautions.
To prevent imperfections caused by foreign objects in resin, work in a well-ventilated area and cover your work with a cardboard box or tent. If necessary, lightly sand the surface and re-pour a second layer of resin.
Uneven or poorly spreading resin can be addressed by leveling the piece before resigning, mixing slightly more resin than needed, and applying a generous amount of resin to the entire surface. If needed, lightly sand and re-pour a second layer.
To avoid yellowing, use resin with UV and HALS stabilizers, keep resined pieces out of UV light, and choose an ArtResin formula with UV stabilizer and HALS for yellowing protection.
When troubleshooting resin surface imperfections, ensure you work in a well-ventilated area, cover your work, lightly sand and re-pour resin as needed, and wait for the first layer to cure before adding more resin.
Additionally, to prevent lines and streaks in the resin, ensure thorough mixing and timely pouring, and pay attention to the quality and condition of the mold and pouring surface.
Uneven Spreading of Resin

Uneven spreading of epoxy resin can be caused by factors such as an uneven work surface or insufficient application of resin. To achieve a more even spread, consider the following steps:
- Level the surface: Ensure that the work surface is flat and level before pouring resin. Any unevenness in the surface can cause the resin to flow unevenly.
- Apply sufficient resin: Use slightly more resin than what’s calculated by a resin calculator. This allows for a generous application of resin, ensuring that the entire surface is covered adequately.
- Consider a second layer: If the first layer of resin doesn’t spread evenly, you can pour a second layer. Before doing so, lightly sand the surface and make sure to scrape the sides of the container to blend any unmixed resin. This will help achieve a more even application.
Yellowing of Resin
To address another common issue in epoxy resin application, we’ll now discuss the yellowing of resin caused by exposure to UV light. When resin is exposed to UV light, it undergoes a chemical reaction that leads to yellowing. This can be a frustrating problem, especially when you’ve put in a lot of time and effort into creating your resin art or coating.
To prevent the yellowing of resin, it’s important to use a resin that contains UV and HALS stabilizers. These additives help to protect the resin from the harmful effects of UV light. ArtResin, for example, is formulated with a UV stabilizer and HALS, making it resistant to yellowing. However, it’s important to note that even with these additives, resin isn’t recommended for outdoor use due to prolonged exposure to UV light.
In addition to using a resin with UV stabilizers, it’s also crucial to keep your resin pieces out of direct sunlight or any other sources of UV light. This can help minimize the risk of yellowing over time. When working with resin, it’s important to have a clean and dust-free work area. Dust particles can act as catalysts for the yellowing process, so it’s best to work in a controlled environment.
Furthermore, it’s important to store your resin properly to maintain its quality and prevent yellowing. Keep the resin in a cool, dark place, away from direct sunlight and high temperatures. Resin has a shelf life, and using expired resin can increase the likelihood of yellowing.
If you do encounter yellowing of resin, there are some steps you can take to try and fix the issue. One method is to apply heat to the resin using a heat gun or hot water. The heat can help to reverse the yellowing process and restore the resin to its original clarity. However, it’s important to note that this method may not always be successful, and prevention is always better than trying to fix the issue afterward.
Sticky Resin

Inadequate mixing or incomplete catalyzation can result in sticky resin. When using resin for the first time, it’s crucial to follow the manufacturer’s instructions for proper mixing ratios and thorough stirring.
Here are three essential points to consider when troubleshooting sticky resin:
- Mixing technique: Make sure to mix the resin and hardener thoroughly, scraping the sides and bottom of the container to ensure even distribution. Incomplete mixing can lead to sticky spots in the resin, which won’t cure properly.
- Surface preparation: Before applying resin, it’s a good idea to clean and dry the surface thoroughly. Unclean surfaces or the presence of contaminants can prevent the resin from adhering properly, resulting in sticky resin.
- Curing time: After applying resin, it’s crucial to let it dry and cure for the recommended time. Rushing the curing process can lead to sticky resin. Be patient and allow sufficient time for the resin to harden completely.
Frequently Asked Questions
Why Is My Epoxy Not Working?
Your epoxy may not be working due to common mistakes such as incorrect usage ratio, pouring too soon, low temperature, or incorrect mixing. Troubleshoot by following tips for achieving a smooth finish and addressing curing time, storage, air pockets, and discoloration.
Why Is My Epoxy Resin Not Self-Leveling?
To troubleshoot epoxy resin that doesn’t self-level, check if the surface was level during pouring. Use a self-leveling resin for even curing. Adjust the mold or surface for proper leveling. Understanding self-leveling properties is crucial for smooth finishes.
Why Is My Epoxy Not Adhering?
If your epoxy is not adhering, common mistakes include incorrect mixing ratio, pouring layers too soon, low temperature, and adding additives after mixing. To troubleshoot, ensure proper surface preparation, and follow instructions carefully.
What Happens if You Put Too Much Hardener in Epoxy Resin?
If you put too much hardener in epoxy resin, the curing process may accelerate, causing potential cracks, yellowing, or brittleness. To correct it, adjust the resin-to-hardener ratio and ensure proper measurement. Prevent over-hardening by following recommended guidelines.
Conclusion
In conclusion, troubleshooting epoxy resin issues requires attention to detail and adherence to proper techniques. By addressing common problems such as uncured resin, bubbles, surface imperfections, uneven spreading, and yellowing, one can achieve a high-quality resin finish.
While some may argue that troubleshooting resin issues can be time-consuming, the investment in proper preparation and application will ultimately result in a smooth and durable resin surface.


